Okay, this afternoon, I started a hunt for a recipe for Chocolate Quick bread, or a chocolate coffee cake, and I came upon a great recipe for Chocolate Quick bread with Peanut Butter Cream cheese spread from Dara over at Cookin' Canuck . Only to discover that it was actually a guest post by Michelle at Brown Eyed Baker . That however, is irrelevant, because it was after I had printed off the recipe, and was getting set to make it, that the bananas fell out of the freezer.
Uh huh, so many bananas in our freezer that when I opened it, a bunch fell out. You see, in the winter time, we go through many many many bananas. In the summer, it is a different story, and I often end up throwing them into the freezer to keep the fruit flies away. So, back to these frozen bananas...I tried to get them back in the freezer, but the two bags of blueberries appeared to have been the ones responsible for the eviction and those bananas just weren't going back in.
So, instead of Chocolate Quick Bread (a la Brown Eyed Baker), I made my own banana bread, with a little chocolate twist...

Double Chocolate Chunk Banana Bread: 2 loaves
Preheat oven to 350F, spray or grease two 9x5 loaf pans.
You will need:
2 cups mashed banana (about 4 large bananas)
1 1/2 cups dark brown sugar
1/2 cup canola oil
1 cup plain yogurt
4 eggs, beaten.
Place bananas in large bowl or that of a standing mixer. Cream sugar with bananas, add oil, yogurt and eggs. Continue mixing until well combined.
In medium bowl, combine :
1 cup natural cocoa powder
1 cup all purpose flour
1 cup fine grind whole spelt flour (you could use all purpose or regular whole wheat, but I like spelt in banana bread)
2 tsp baking soda
2 tsp baking powder
3/4 tsp salt.
Stir well with a fork. Add slowly to the wet ingredients, mix until just combined. Add 1 cup chocolate chips or chocolate chunks (about four 1 ounce squares, chopped coarsely), and let beater go around 3 or 4 times.

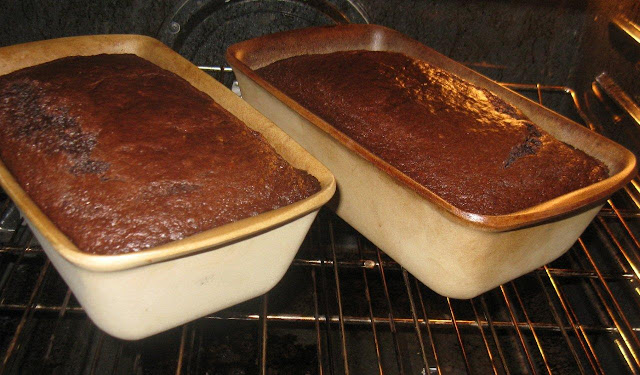
Pour batter into prepared pans and bake for 50 minutes or until tester comes out clean and bread has pulled away just slightly from the sides. Cool for a few minutes on a rack in pans, then tip out and cool completely before serving.
Voila! And so yummy! And your kids can even take them in their lunches! The teachers will be asking you to send them on special occasions (like halloween or for a birthday) because they are still a "healthy" treat!
Happy Packing!
Kim
 Linked up to:
Uh huh, so many bananas in our freezer that when I opened it, a bunch fell out. You see, in the winter time, we go through many many many bananas. In the summer, it is a different story, and I often end up throwing them into the freezer to keep the fruit flies away. So, back to these frozen bananas...I tried to get them back in the freezer, but the two bags of blueberries appeared to have been the ones responsible for the eviction and those bananas just weren't going back in.
So, instead of Chocolate Quick Bread (a la Brown Eyed Baker), I made my own banana bread, with a little chocolate twist...

Double Chocolate Chunk Banana Bread: 2 loaves
Preheat oven to 350F, spray or grease two 9x5 loaf pans.
You will need:
2 cups mashed banana (about 4 large bananas)
1 1/2 cups dark brown sugar
1/2 cup canola oil
1 cup plain yogurt
4 eggs, beaten.
Place bananas in large bowl or that of a standing mixer. Cream sugar with bananas, add oil, yogurt and eggs. Continue mixing until well combined.
In medium bowl, combine :
1 cup natural cocoa powder
1 cup all purpose flour
1 cup fine grind whole spelt flour (you could use all purpose or regular whole wheat, but I like spelt in banana bread)
2 tsp baking soda
2 tsp baking powder
3/4 tsp salt.
Stir well with a fork. Add slowly to the wet ingredients, mix until just combined. Add 1 cup chocolate chips or chocolate chunks (about four 1 ounce squares, chopped coarsely), and let beater go around 3 or 4 times.

Pour batter into prepared pans and bake for 50 minutes or until tester comes out clean and bread has pulled away just slightly from the sides. Cool for a few minutes on a rack in pans, then tip out and cool completely before serving.
Voila! And so yummy! And your kids can even take them in their lunches! The teachers will be asking you to send them on special occasions (like halloween or for a birthday) because they are still a "healthy" treat!
Happy Packing!
Kim

ooh, I feel like I could smell these baking from here! I would love a slice- it looks delicious!
ReplyDeleteLooks good, but what intrigues me are the loaf pans - they look ceramic, which would be great. Are they?
ReplyDeleteHey, Geoff, they are stoneware...from Pampered chef. I love them. A bit like having cast iron for baking.
ReplyDeletehttp://www.pamperedchef.ca/ordering/prod_details.tpc?prodId=469&catId=9&parentCatId=9&outletSubCat=